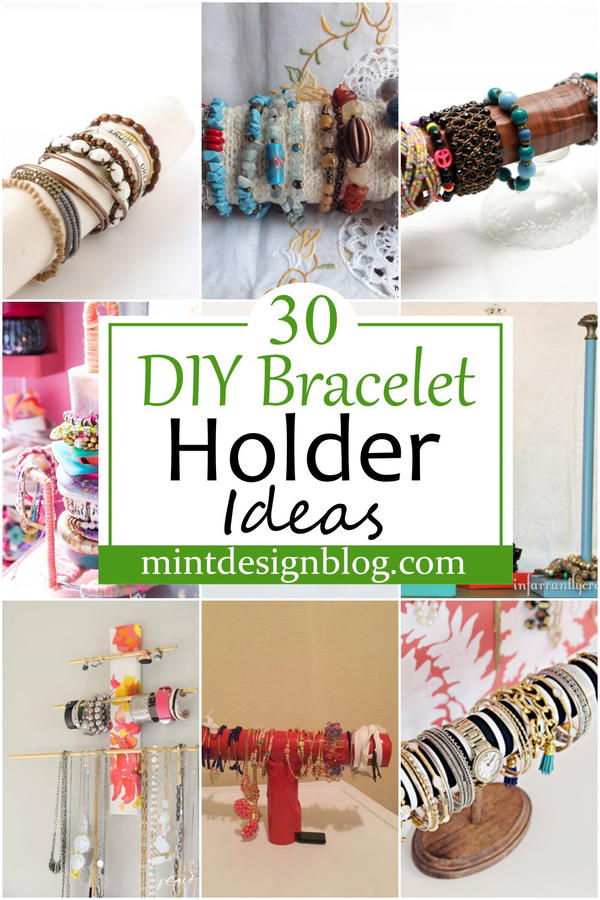
Daily living can create a lot of clutter and mess, even for those who are organized. Jewelry is particularly difficult to manage. So if you’re looking for a bracelet holder, this post will give you some ideas on how to make one for yourself without having to spend money on expensive jewelry holders. These stylish pieces are great for keeping your bracelets and watches organized, safe, and easy to see. All the tutorials below are simple and quick to make, so you can use them on your own or with your friends. These DIY Bracelet Holder Ideas will not only help you keep your bracelets in one place, but also it will help protect them from breaking. We cover several DIY bracelet holder ideas, from a simple bracelet bar you can make of wooden dowels to a glam bracelet holder sure to suit any room decor!
How You Can Make:
A bracelet holder is a wonderful way to organize and display your treasured bracelets. These can be made out of literally anything so long as it has an opening large enough to fit the wristbands over them. These ideas are easy to do, use recycled materials, and can be customized to fit your space or style. Whatever you’ve got lying around at home can be repurposed into a stylish bracelet holder if you have some patience and creativity. All you need to do is gather all your jewelry, spot it in the room where you plan to keep them, and begin with the DIY project.
Uses And Scope:
We have listed some of the best DIY Bracelet Holder Ideas, which were selected based on their creativity, ease of making, and functionality. Making your own bracelet holder is the best way to ensure your jewelry collection is safe. The bracelets are easily accessible, so you can slip on a piece of jewelry whenever needed. And since they’re made by hand, you don’t have to use them to keep your bracelets tidy—you can also use them for other accessories!
DIY Glam Bracelet Holder
Making jewelry is always fun and creative, but keeping your masterpieces safe sometimes takes a little more thinking. This DIY Glam Bracelet Holder is a great solution for storing delicate bracelets and providing a beautiful, glistening display. This is simply made from a material you can easily find in the store for DIY projects. You can personalize it by getting a piece of cloth with any design that pleases you and sticks pins. It is perfect for displaying those special pieces that you treasure the most.
DIY Recycling Bracelet Holder
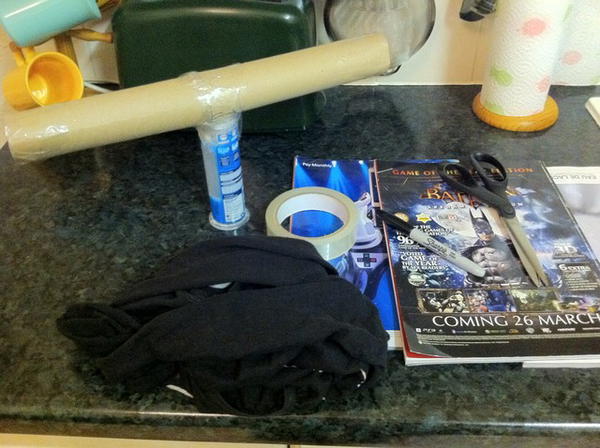
Is your jewelry box full? Do you have a small closet to organize your jewelry and still not enough space to store it all? The DIY Watch & Bracelet Holder is an excellent solution! It’s made with cardboard tubes, making it a great eco-friendly option. This tutorial shows you exactly how to make this beautiful piece of furniture, so you won’t have to spend money on one! The simple design makes this project even easier to complete.
Materials and tools:
- Two cardboard tubes
- One empty toothpaste tube
- Good tape
- Old fabric or paper of your choice
- Old magazines or newspaper
- Scissors
- Sharpie
- Needle and Thread if using a cloth to cover up!
DIY Bracelet Holder Display
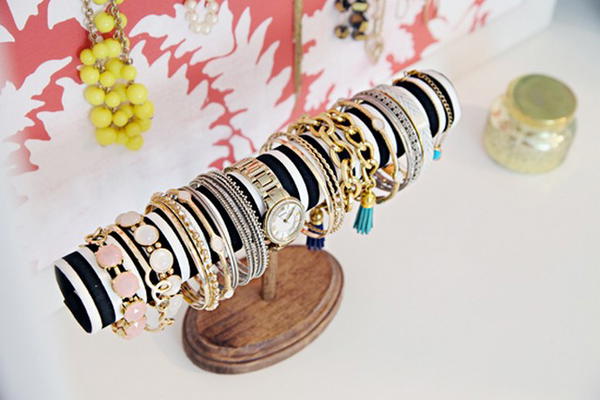
This jewelry display stand allows you to attractively organize and display necklaces, bracelets, or other accessories. The wood plaque can be painted any color to match your room decor. Use fabric scraps as a covering for the dowel and paper towel roll. An easy-to-follow tutorial is included with step-by-step instructions and photos. With this budget-friendly, easy DIY project, you can display your bracelets perfectly and attractively display them on your wall or in your closet.
Materials and tools:
- Wood plaque
- a dowel
- scrap fabric
- paper towel roll
- mod-podge
- wood glue
- paint or stain
DIY Bracelet Holder
Jewelry is a beautiful accessory that adds elegance to any outfit. Unfortunately, it can get tangled in our jewelry boxes or drawers, which makes it difficult to find exactly what you’re looking for. Making a bracelet holder is an affordable and simple solution to this problem. Its super easy construction and instructions make it the perfect way to organize your bracelets. You can easily do this project with only your basic craft materials such as glue, scissors, and paper clips.
DIY Dollar Tree Jewelry Holder
Another way to make your jewelry look good is this DIY bracelet holder. This isn’t your ordinary jewelry holder; it also has a stylish decor to add to your own home. With about five candle holders, 2 Cake Boss Acrylic fondant rolling pins, and a hot glue gun, this bracelet will help you display your favorite jewelry pieces in a fantastic way that makes it easy to choose which ones you want to wear on any given day. Even though this project may be quite cheap, it looks amazing!
DIY Bangle Stand With Handle
This bangle holder comes with a handle to make it easier to carry around. It can hold quite a few bangles, which makes it one of the best stands on today’s market. This little stand is perfect for when you want to take your bracelets with you while traveling. The handle in the middle makes carrying the stand easy, especially if you are just going on a short trip and don’t want to lug along a suitcase full of jewelry.
Bracelet Holder Stand With Paper Towel Tube
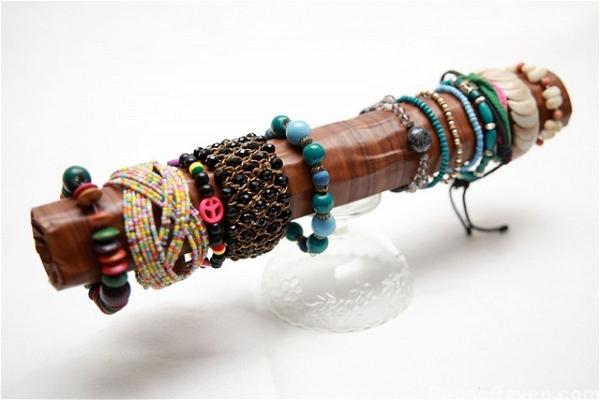
A DIY bracelet holder can be a great gift idea for your loved ones. But, it's also a great way to store your bracelets if they go missing. If you have some extra time at home and want to give something creative as a present, this is the right project for that! With this easy project, you'll make your own bracelet holder in no time. This craft is a great way to display all of your precious keepsakes and show them off!
Materials and tools:
- Old cardboard, an old magazine, or an empty paper towel roll
- scissors
- masking tape
- glue gun/stick or mod podge
- wallpaper sticker or any fabric
- candle holder or ice cream glass cup
Bracelet Holder DIY
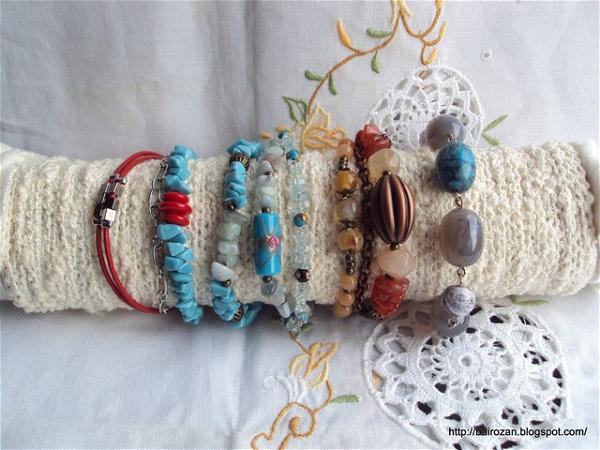
If you love bracelets and other jewelry, this instructable is the perfect way to organize your collection. You'll need a few materials and some creativity. This DIY bracelet display looks great in any home or office environment and can easily be adapted for other types of accessories. You'll have to use a bit of glue to hold the yarn in place, but once it sets, you will have a beautiful bracelet display that goes with any décor.
Materials and tools:
- A piece of the polystyrene packaging sheet
- Polyethylene shockproof insulation
- thrifted yarn
- glue
- ribbon
- yarn
- a cylinder
Bracelet Holder Display Plan
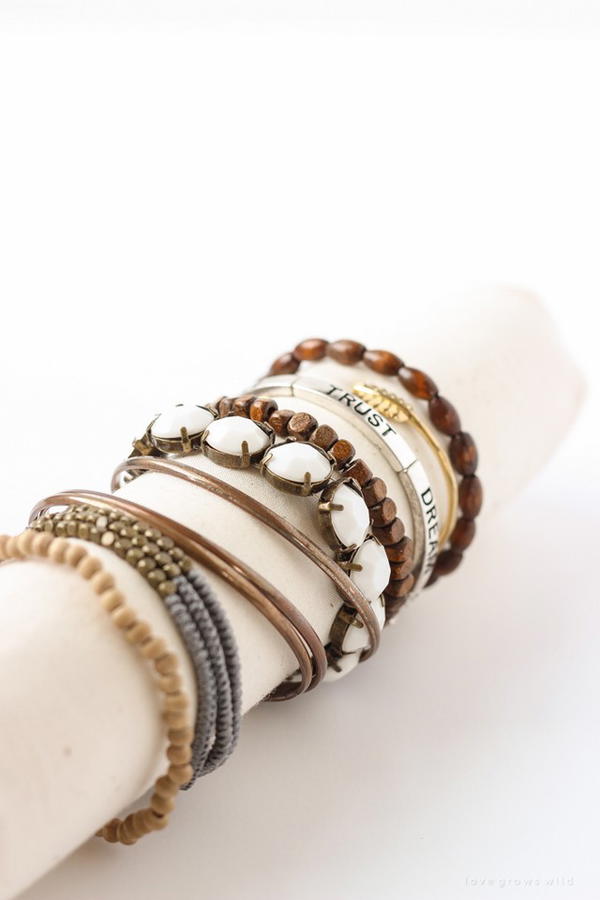
This DIY fabric bracelet holder is a perfect project for using up some of your fabric scraps. It’s easy enough to make while watching a movie or hanging out on the weekend. Once you have all the pieces cut, this DIY bracelet holder comes together quickly with a few hot glue bonds and paint roller covers. The steps are detailed and can be used as a guide for creating many iterations of the same design, or perhaps you’d like to try something more elaborate. Either way, this bracelet holder will hold your bracelets safely and neatly.
Materials and tools:
- fabric
- paint roller cover
- hot glue gun
- scissors
How To Make A Bracelet Organizer
Are you one of those who like to wear stylish bracelets? If yes, it can be challenging for you to find your bracelets in the morning. This is why a personalized bracelet organizer worth having in your closet. It will keep all your beauty accessories in place and makes them easy to access. One of these organizers will also give you all-around protection of your jewelry. You can also use it to hold your earrings or necklaces if you do not want the hassle of arranging each one separately.
Clear Bracelet Holder Idea
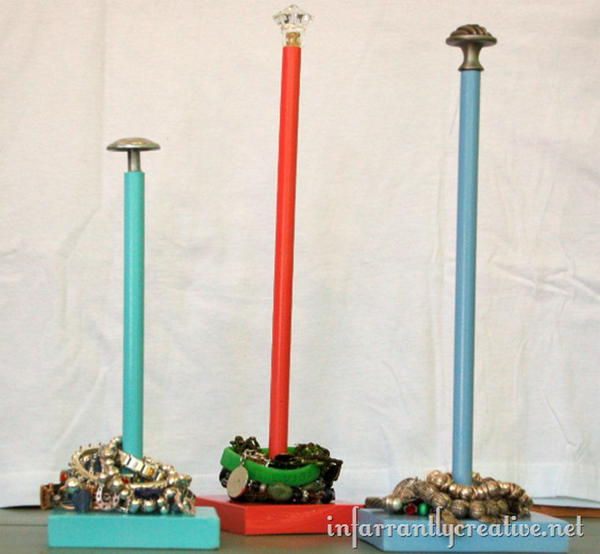
We all know that space is essential in any store. If you have a jewelry store, this bracelet display would be the best idea for you. It can be made with minimal supplies, is easily built, and even more importantly, it will fit perfectly on your work desk or dresser. It would be most useful if you don’t have a lot of counter space in your store, and it can take a lot of bangles and bracelets. This bracelet display will be the pride of place in your store and is both functional and cute.
Materials and tools:
- ½” dowel rods
- Spray primer
- Spray paint
- scraps of wood
- Drill press
- Gorilla Glue
- Old Knobs
- Chop saw
- Sander and sandpaper
Necklace & Bracelet Holder DIY
Keep your bracelets and necklaces in place with this versatile jewelry holder. It can serve as a bracelet holder and an earring holder, so you can keep your jewelry organized and easy to find. With this DIY project, you will learn how to make a bracelet holder as well as an earring holder. Check out the step-by-step instructions in the video tutorial and make your own. The materials are easy to find, and the making process is simple enough for anyone to follow.
DIY Bangle Stand
Display your favorite bangles on this beautiful and flexible bangle stand. This DIY Bangle Stand is super easy to make and looks gorgeous when finished. This one-of-a-kind stand can be customized to match your style, with as many as nine separate steps available for hanging your bracelets. For example, you could remove the bottom six steps and reduce the size of this stand to display smaller bracelets. It is a great way to showcase your collection of bangles in any room!
Home Made Bracelet Holder With Soda Crate
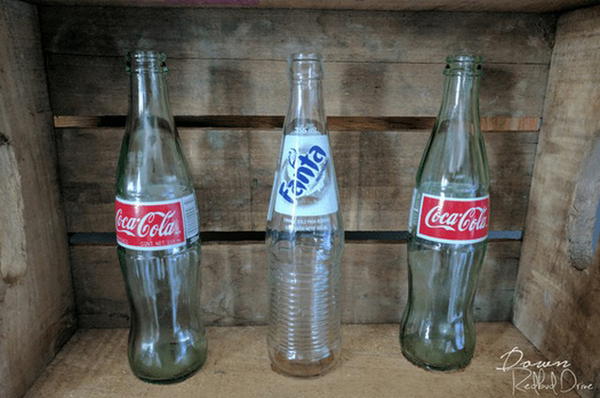
When you have a lot of bracelets and rings that you need easy access to but don't want to be thrown around the house, this DIY Soda Crate Bracelet Holder is a smart solution. All you'll need to do is pick up some glass soda bottles and glue them to the inside of an old wooden soda crate, spray paint it, buy or make a few hooks for necklaces, and mount it on the wall. You've just created an organized jewelry holder that won't take up much floor space in your home!
Materials and tools:
- Old wooden soda crate
- Glass soda bottles
- E6000 Epoxy
- Tape measurer
- Marking device
- Goo Be Gone, or orange essential oil
Necklace And Bracelet Holder
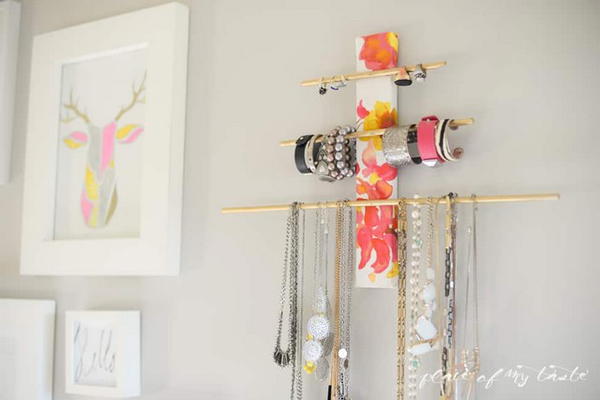
Do you feel overcrowded on your countertops? This DIY wall-mounted bracelet holder is a perfect solution for organizing your bracelets. The construction of this piece is simple, using minimal tools and affordable supplies. This bracelet holder is ideal for holding bracelets and necklaces to look great in any room of your home. The design allows for a range of sizes to fit any size wrists and the number of bracelets you want to display.
Materials and tools:
- 2 x 4 wood panel
- fabric
- metallic gold spray paint
- wood rods – $0.87 /pc
- Six nails
- sawtooth hanger
Wooden Bracelet Holder DIY
This wooden bracelet holder is designed to make your favorite bracelets wear and be stored in an attractive manner. The making process of our Wooden Bracelet Holder DIY is quite simple. All you need to do is follow the step-by-step video guide to make it. The materials are also easy to acquire and can be found in any craft store or even a dollar store. The wooden bracelet holder looks amazing and can be used as a beautiful decor for your room too!
Homemade DIY Bracelet Holder
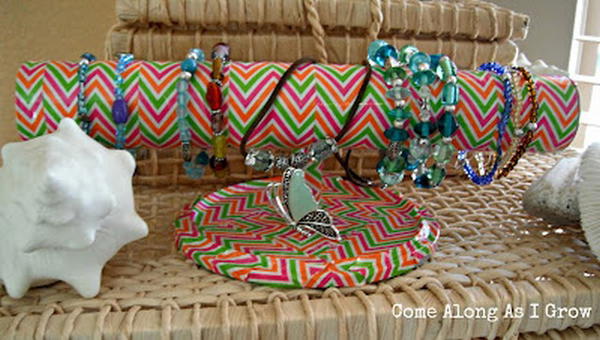
With all the different types of bracelets, it can be hard to keep them organized. This DIY bracelet organizer project is for someone who loves bracelets and wants a way to store them without worrying about how to organize them and stay organized. This holder can be made using less money than store-bought organizers and hooks using a towel roll, CD holder, and duct tape. It is not only useful but also decorative and colorful. The making process is quite easy to follow.
DIY Bracelet & Watch Storage
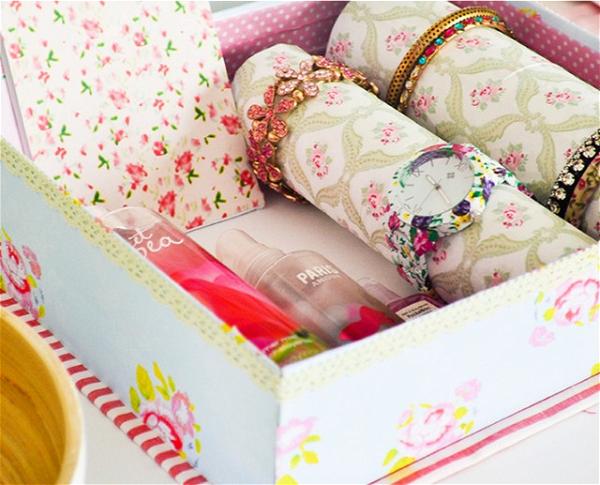
Organize and display your bracelets and watches with the Watch & Bracelet Holder. Not only does this case keep all your bracelets in one place, but it also protects your jewelry from nicks and dings. It can be customized to suit your style, but if the colors are too feminine for you, you can always switch out the flowers for something more masculine. Featuring floral patterns, this holder works well for any room or setting.
Materials and tools:
- A cardboard box
- Discarded toilet paper/kitchen towel tubes
- Napkins or pretty scrapbooking paper
- Double-sided tape
- Velcro
DIY Bracelet Stand
Do you have a lot of bracelets? Don't be embarrassed to show them off in style with this DIY bracelet stand. It could be used for necklaces and rings, too! You can select the materials, colors, and designs of your choice to make the one most suitable for you. It would also be a good idea to measure the space where you intend to place it at home. This DIY bracelet holder is large enough to contain many bracelets, and its design guarantees easy access when selecting your favorite accessories.
DIY Bracelet Holder
Have you ever felt that you don’t have enough places to store your bracelets? If yes, here is a simple way to make your own bracelet holder. If you are a person who is always on the go or just starting in jewelry making and trying to collect some pieces at a low price, this is the perfect solution for you. The creator shows you all the steps she used to upcycle a bottle into a beautiful bracelet holder, making it ideal for people who do not own a lot of bangles as it is small and would only contain a small number of bracelets.
How To Make A Magazine Bracelet Holder
This bracelet holder makes a great gift to yourself. Link your favorite bracelets and hang them from the magazine holder to create a beautiful display piece. The process is easy and won’t require you to spend a dime. Choose your favorite vintage magazines, get creative with the tape, clear adhesive spray, and voila! You have a beautiful bracelet holder that you can use for everyday wear or as something to show off on your desk at work.
Wooden Bracelet Holder Idea
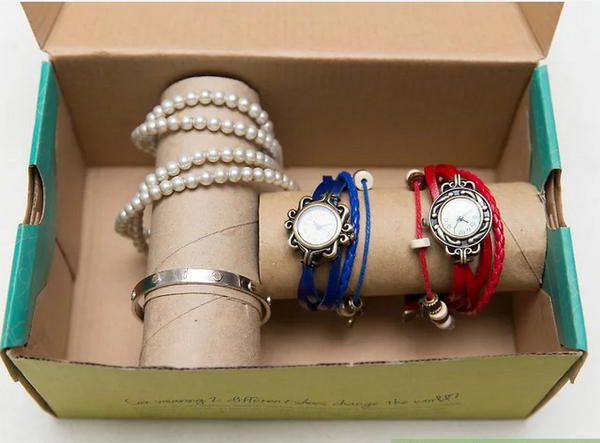
This DIY guide will show you 3 different methods to make your own bracelet holder. For this one, you’ll need paint, glue, and cardboard to make the bracelet holder. You can also use fabric instead of cardboard if you like. Begin by cutting out a small strip of cardboard, then cut slits on each side and fold the flaps over on top of each other, as shown in the image above. Once you finish that, glue all the pieces to make a holder. You’ll then take your tube of paint and paint it black with a foam brush before spraying it with white spray paint for the metal effect.
DIY Bracelet Organizer Tray
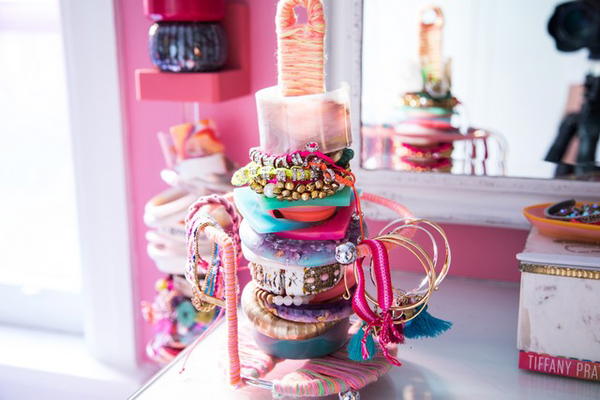
This DIY bracelet holder is a fun and stylish way to display your bracelets. It’s so simple to make, and you can start with just yarn, some scissors, and a toilet paper roll holder. The steps include:
- Simply cut the toilet paper roll in half.
- Tying the pieces of yarn at intervals around it.
- Weaving it in and out of the holes made by cutting the tube lengthwise until it has covered most of the outside of your tube.
Once you are finished weaving, trim off any excess yarn so it doesn’t stick out above where you want to hang your bracelets. Then fill it with bracelets and hang!
How To Make A DIY Bracelet Holder
If you’re looking for a stylish yet simple way to store your bracelets, this DIY bracelet holder pattern is perfect! Just cut up a few toilet paper tubes and some cardboard, and you’ll have an attractive storage solution that won’t take up much room in your closet or dresser. This unique DIY bracelet holder idea is the perfect addition to your bedroom or bathroom. You can customize this holder according to your desired dimensions, so check out the video guide before you start!
How To Make A Bracelet Holder
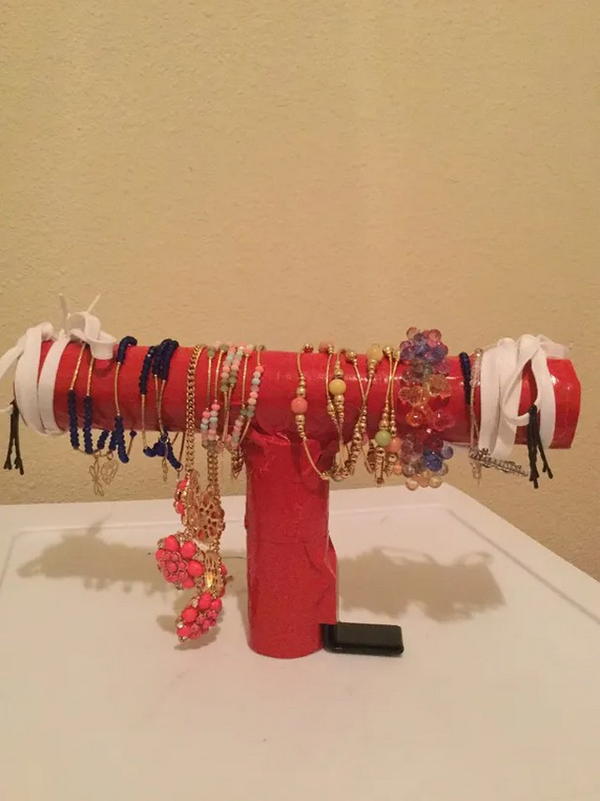
Like the other ones, this tote holder is also an easy DIY project that can be done within a few minutes. It’s very simple and chic to keep your bracelets organized in the prettiest way possible. And the best part is, you can paint them in any color, so if you’re looking for a change of style or want them to match your decor, this one works just fine. This idea is perfect for all your favorite bracelets, even the ones that don’t normally fit in the box or bag organizer.
Wall Mounted Bracelet Holder
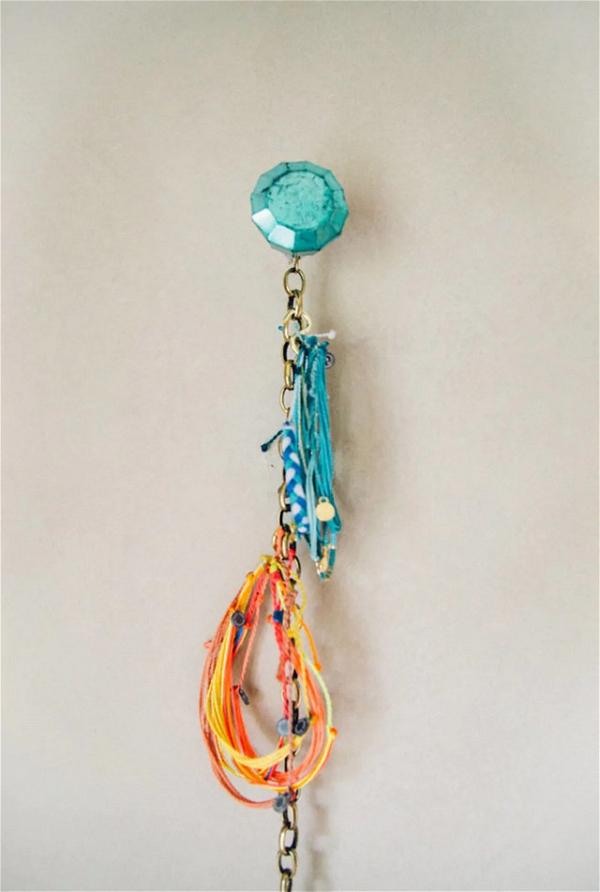
This is a unique bracelet holder composes by an innovative DIYer. This stands out compared to others because of the unique design and low price. The materials needed for making this include a knob and “S” hook, which can be gotten locally at any hardware store. A jewelry chain link is also required, but these can easily be bought at any local craft store, including crafters warehouse and hobby lobby. You can repurpose a unique jewelry knob and a jewelry chain link, and in less than 20 minutes, you have your own handmade bracelet holder.
DIY Bangle Stand With Jute Rope & Cardboard
Finally, a bangle stand can easily hold all of your bangles. This easy DIY project will work with cardboard, jute rope, and some glue to hold it together. The result is a stylish and sturdy item that will look great on any countertop. The packaging includes instructions for assembling the stand and making your own design. For support, use a glue gun to attach the rope to the cardboard. The bangle stand allows you to spread out your bracelets in an organized manner so you can see all of them at once!
DIY Bracelet Organizers
Don’t have time to take your bracelets and earrings to a professional organizer? Then follow this tutorial and show off your collection the way you want. Using materials at hand, you can put together your own bracelet holder that is both practical and stylish. It is the best way to keep your bracelets in order and look beautiful. It’s not that expensive, and you can have a super awesome bracelet holder at home!
DIY Bracelet Display
Display your bracelets professionally and creatively with this one-of-a-kind DIY Bracelet Display. This is a great way to store and display your handmade jewelry for sale or as a fashion statement at home. The tutorial is easy to follow and does not require anything complicated or expensive. People will love this display because it shows off your work in an attractive way that allows customers to see the color and texture of your design details. The best part about this DIY bracelet display is that you can outfit it with whatever type of jewelry you want!
