A ceiling fan is an essential part of any home. However, with the usual small sizes of ceiling fans and the lack of open spaces, sometimes people choose not to use them simply because there is no accessible space for such a huge fan. That's where DIY fans come in! If you love mini fans and have enough space on your table or walls in your home, here are 20 DIY Mini Fan Ideas that will blow your mind. Sometimes DIY mini fans can serve as beautiful decorations for your home, especially Japanese fans. Japanese fans are known for their aesthetics and functionalities. In most cases, they serve as the perfect decor accents in your home. If you're looking for something small but amazing, this list of DIY Fan Ideas is perfect for you.

No Advance Skills Required:
With these DIY fan ideas, you will be more than happy to learn how you can create your own strong fans that work automatically when turned on. There are a lot of methods to make it, and the below-listed DIY Mini Fan will teach you how. The great thing about these DIY ideas is that most of them are easy and fast to make, so you don't need to spend too much time away from your summer vacation.
Uses And Benefits:
Ventilation and temperature control are easier when you have air movement from a fan. Some fans can be bulky and take up space in your entire home, so these 20 DIY Mini Fan Ideas will help by providing you with small, portable blades that you can move around your room whenever you want to turn on some air conditioning. To make the best use of your fans, place them in an area with high airflow and minimal obstructions. For example, placing a fan directly across your bed will allow you to stay cool easily during hot summer nights. Also, try different locations for your fans when you sleep to get a better experience for your fan.
The wide variety of DIY Fan plans is a welcome sight, especially if you are looking for an easy way to enhance the décor of your home. Undeniably, it's refreshing to see unique and creative designs for fans, which you can easily make using things around your home or garage. These DIY fans will give you exciting and creative options for your summer house decoration!
You Can See: 28 DIY Night Lights To Match Any Home Decor
How To Make A Bladeless Fan
The bladeless fan is easily made with simple tools such as a compass, glue, motor, and metal foil. Begin by drawing out a circle on the metal foil using an accurate measurement. Then cut the circle every 30 degrees inside the circle to give a fan-like figure. Next, install both the motor and your made shape onto an already drilled pipe that will be used as its base. Once done, attach it securely and plug in your device so you can start using it immediately!
Materials and tools:
- Foil plate
- Motor
- 2 pieces of wood
- Drilling machine
- Glue
- A plastic bucket
- A compass
- Pipes
How To Make Japanese Fans
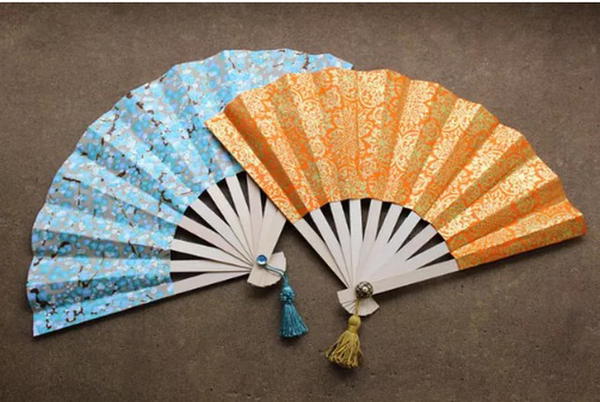
Japanese fans take the tip of a home and use it to open up a small hole or two in each stick. If you want to ensure that the fan is strong enough, use two sticks. Pack them together, insert a headpin through them, and close the other end of the pin. Draw a large arc on a sheet of white paper, then position the sticks on the sheet with their pivot point at the bottom and center. Trace the outline of your blades on the white paper with a pencil, remove all of your sticks, and then add glue to them. Next, put it back onto that paper face down and glue it completely.
Materials and tools:
- Decorative wrapping paper
- Plain white paper
- 10 wood sticks
- 2-inch headpins
- Push pins
- Tassel
- Glue
- Drawing tools
- Buttons.
How To Make An Electric Table Fan
Making an electric table fan may seem like a difficult task, but it’s quite simple. The project will only take around half an hour of your time to make. First, draw two circles from the cardboard. Glue the two circles together to form one piece on a rectangular cardboard sheet. Make a dent in the rectangular cardboard sheet so that it can fold. Glue this dent to make it into a pipe and insert the electric motor into the base of the stand. Attach the fan to the electric table stand and use any plug to start generating power for your fan!
Materials and tools:
- A fan
- Glue
- Cardboard
- A motor
- Scissors
DIY Mini Fan
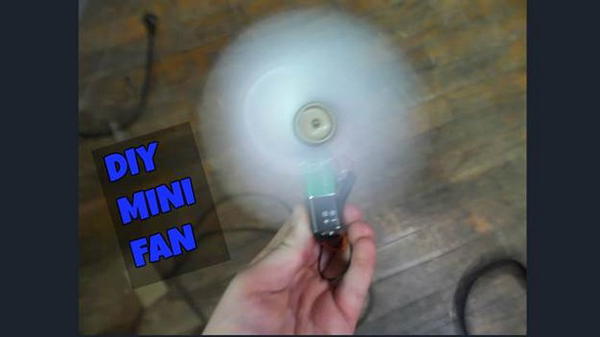
You need a fan, but the only thing that can make you feel like the air conditioning is not working is a badly designed mini-fan. Not any more. After trying to find the ideal solution to this problem and failing at all of them, we decided to solve it ourselves. The Mini Fan combines a fashionable design with maximum ventilation. This DIY mini fan is a great addition to general home appliances. It is easy to make, and it only takes a few minutes to get the job done. Everything you need for this DIY mini fan is in your home!
Materials and tools:
- Fan blade
- DC motor
- 9V rechargeable battery
- 9V battery snap
- button
- hot glue gun
- soldering iron
- Plastic Spoons
How To Make An Electric Table Fan Using Bottle
Make use of your empty and old bottles by converting them into an electrical fan. This tutorial will teach you how to cut the bottle into six equal parts, remove three parts for creating three blade fans and drill a center through the cover so a motor can be attached. The parts that are taken out create patterns in the circular border of the fan, which is visible from both sides. The fan can be mounted on a table or wall to give you the perfect spot to use your new electric fan.
Materials and tools:
- An empty bottle
- Some wires
- A motor
- A battery
DIY Bladeless Fan
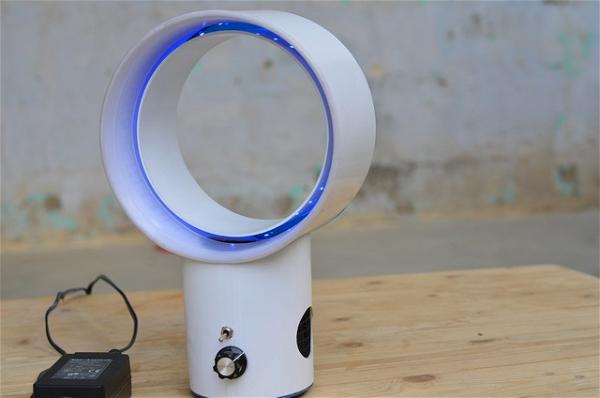
Bladeless fans are an excellent way to ensure your home is free from blades. They are not only safe but also look great. With careful planning and craftsmanship, you can create your own bladeless fan. This bladeless fan works just like your average, everyday fan. It's portable, so you can place it anywhere you need to cool off. The PVC pipe structure of the Bladeless Fan provides a sturdy base and offers several benefits over traditional blade fans, including safety and noise reduction potential.
Materials and tools:
- several PVC pipes
- a plastic bowl
- 3mm sheets of fiberglass
- miter saw
DIY Fabric Hand Fan
This DIY fabric hand fan is the perfect alternative to traditional paper fans when it's hot. And once you try it out, it will be the only thing you use to cool down. Make one today with our simple tutorial as a great idea for summer crafting, especially if you're on a budget. Choose your favorite fabrics, cut and glue the two together with fabric glue to make your own hand fan in no time. This can be an inexpensive gift option that your loved ones will appreciate!
Materials and tools:
- A fusible interface
- Fabric
- Glue
- Iron
- Scissors
- Plywood
DIY Electric Handheld Fan
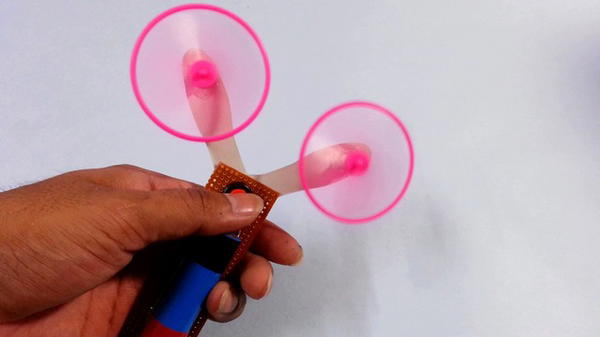
Cutting the plastic sheet is easy, but you need to be careful while making cuts. If you do not get the perfect dimension of your motor shaft and toggle switch, use an X-acto knife to make marks on a plastic sheet. Once you have cut out the shape, glue it firmly to the main body and attach a propeller. Ensure that everything is attached properly as it can also cause electric shock. You can use this fan in your office, bedroom, or kitchen. This is a DIY project, so it requires some effort to make it perfect.
Materials and tools:
- Coreless motor
- Toggle switch
- 3-7v Li-ion battery
- PCB board
- Office clips
- Scissors
How To Make A DIY Bladeless Fan
To make this bladeless fan, you must get a motor, base, and ring made of Carson sheets. First, measure the size of the base and cut it out using a ruler and cutting tool. Then make a feeding hole in the middle of the base. Place the motor on top of it and mark around its size. Cut the holes for motor connections with a cutting tool. Make another feeding hole in the middle of two rings glued together with super glue for easy assembly on the bladeless fan.
Materials and tools:
- Carson sheets
- Ruler
- Cutting tool
- Glue
- Motor
Hand Fan DIY
The board must be plywood with a rectangular base for this handmade fan. Glue the feathers across the board sections and leave a small gap in between so they don’t overlap each other. Repeat the same process on the other side. Finally, wrap up the handle and make sure everything is glued properly. You can choose any flower to adorn your fan; choose a pretty lace flower like orchids or roses for your wedding day!
Materials and tools:
- 2 yards of feathers
- A hot air gun
- Fan skeleton
- Scissors.
How To Make A Pocket Fan
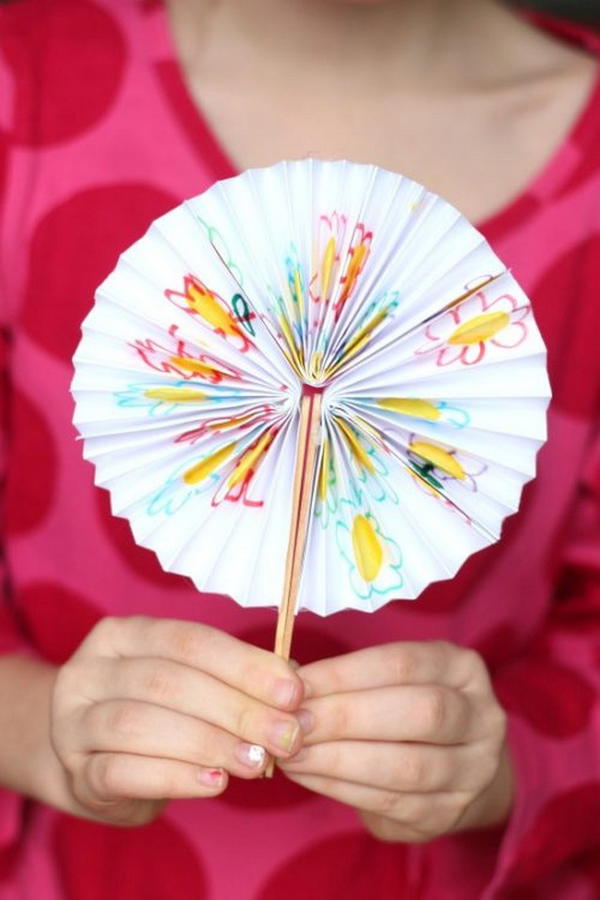
Having a fan with you is always good, but they are usually bulky and hard to carry. This neatly designed DIY fan is made from a few sheets of paper and popsicle sticks to assemble in a few minutes and use wherever you go. The materials are inexpensive, and you can make one yourself in less than an hour. This DIY tutorial will guide you through all the steps to make a paper fan that folds open and can be used to keep cool wherever you go.
Materials and tools:
- Three sheets of paper
- Two popsicle sticks
- One runner band
How To Install A Ceiling Fan
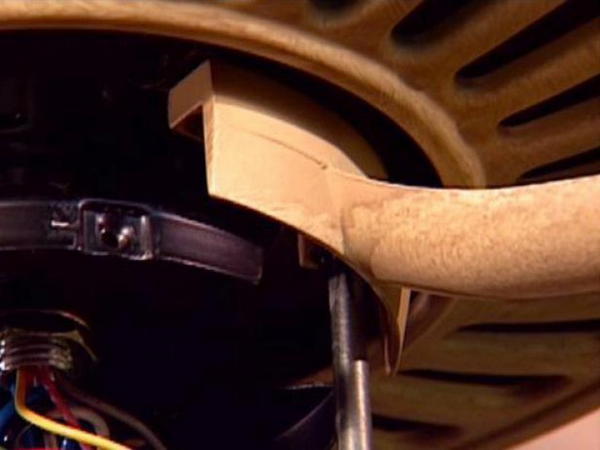
Installing a ceiling fan is not difficult if you follow some basic steps. First, turn off the electricity to the circuit where you will be installing the ceiling fan, then install a support brace in the ceiling joist you'd like for the fan to hang from. Next, screw the fan bracket onto the brace, and install any wires that lead to or out of the motor. Install the hardware and wire your fan as per instructions. Next, attach the blade and light fixture, then attach the cover. These steps will help you install your ceiling fan safely, with minimal inconvenience or damage to your home.
Materials and tools:
- Wires
- Plier
- Common screwdriver
- Masking tape
DIY Mini Electric Hand Fan
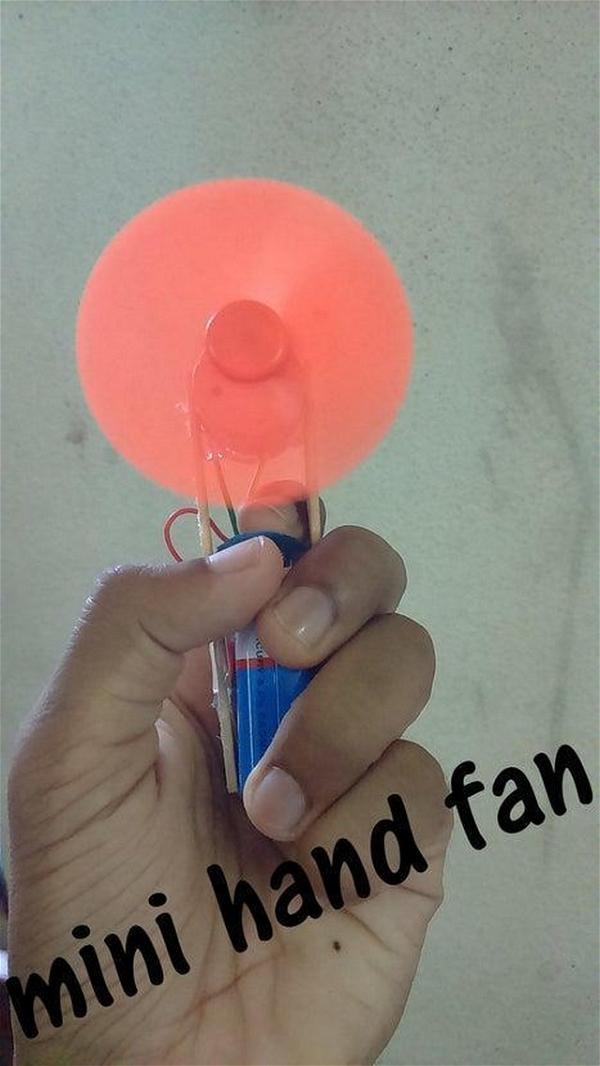
This mini electric hand fan is constructed from popsicle sticks, a plastic fan, battery, battery holder, and motor. The popsicle stick is glued to the side of the battery; the battery holder terminal is connected directly to the motor, and then the motor is placed between two popsicle sticks. Next, connect one end of the fan cable with the motor terminals and turn on the power. You can also add an adhesive strip to secure it in one place.
Materials and tools:
- Popsicle sticks
- A plastic fan
- Battery
- Battery holder
- Motor
How To Make A Bridal Hand Fan With Feathers
The hand fan is a simple but attractive accessory for any bridal. It can be made on the computer, with decorative papers and other materials. First, you need to know the number of feathers you need to incorporate into your design. Once you've gotten this done, cut out paper templates or use a drafting machine to produce an actual template of the fan skeleton. Then, glue the pieces together as wide as you want them. This technique can make any size hand fan you might need for your wedding.
Materials and tools:
- Processed chicken feathers
- Ribbon, Glue gun
- Plastic hand fan, Flat beads
- Glittery hard net
How To Make A Rechargeable Fan At Home
Many DIY rechargeable fans are available in the market, but we have a more economical and feasible option for you. It's not just a fan but a DIY project as well. You can create this rechargeable fan with cardboard and basic tools at home. Follow our instructions below on how to make your own DIY rechargeable fan at home. Once the fan is ready, you only need to charge it once a week or so, depending on use.
Materials and tools:
- Cardboard
- A DC motor
- Scissors
- Glue
DIY Lamp Fan
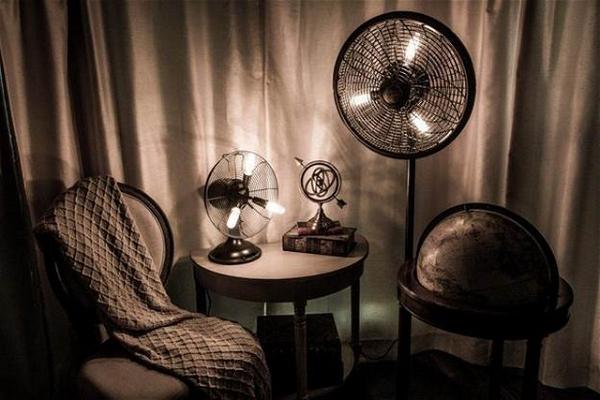
This is a very simple project. You will also need to take apart the fan and remove its original wiring so you can install the lamp kit in it. The cage that comes with most fans can be removed and repositioned. Spray paint the inside of the fan before putting everything back together and wire the lightning into it so that when plugged in, it will push up through the bottom of your new portable lamp table fan. It can be used as a table lamp or on your desk to add light and comfort.
Materials and tools:
- A fan
- 3-way light socket
- Edison bulbs
- Lamp wiring kit
- Brass spray paint
DIY Paper Plate Fan
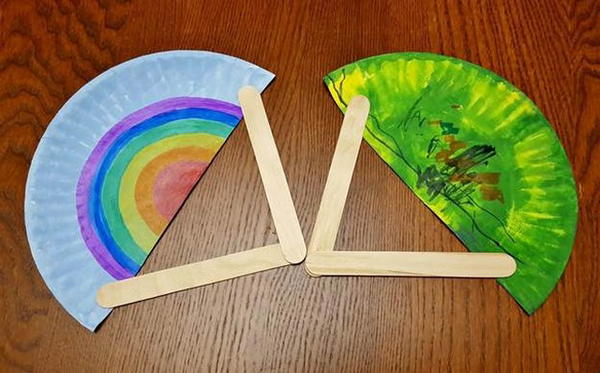
This is the simplest and cheapest paper fan you can see out there. First, cut the paper plate, color one side of each half, and let it dry overnight. Next, glue together two sticks at an angle that forms a -shape. Glue this onto one of the half plates and repeat the process with another stick on the other side of the first stick to create one complete fan. Now that your fans are ready use them for parties or as simple decor around your house!
Materials and tools:
- Craft sticks
- Colored card paper or paper plate
- Paint in different colors
- Glue
- Scissors.
Beautiful Homemade Hand Fan
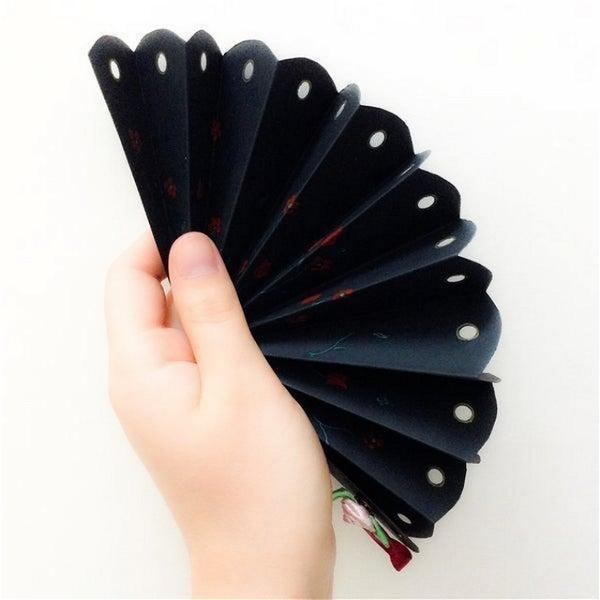
This fan is made from colored cardboard paper and has origami-style folding patterns. Using a protractor to make circular folds, this 4-panel fan would only need a hole punch to complete the process. Make sure you use the sharp side to cut out the holes in the circle. If there’s no hole puncher available, you can use a pair of scissors or a knife instead. When folding it into a fan shape and trimming the edges, keep in mind that they should be straight lines so that they can be connected properly when you put them together later on.
Materials and tools:
- Colored cardboard paper
- Pencil and eraser
- Drawing compass
- Ruler and protractor
- Scissors
- Hole puncher
- Satin ribbon
- Glue
How To Make A Bladeless Fan
A bladeless fan is energy efficient and emits a smooth, consistent air stream. This high-volume, low-pressure design requires no blades or moving parts and is operated by a brushless motor. A bladeless fan uses an airfoil-shaped ramp to propel air in a single direction. The process is similar to how airplane propellers work without blades. First, attach the fan to the base ramp to easily remove it for cleaning or replacement. Next, assemble the ramp pieces using screws and glue as needed. Finally, screw the motor inside the base ramp to face its given exit point, then flip on power!
Materials and tools:
- A brushless motor
- 3D printed propeller
- Airfoil-shaped ramp
- Glue
- Scissors
- Screws
DIY Wood Stove Fan
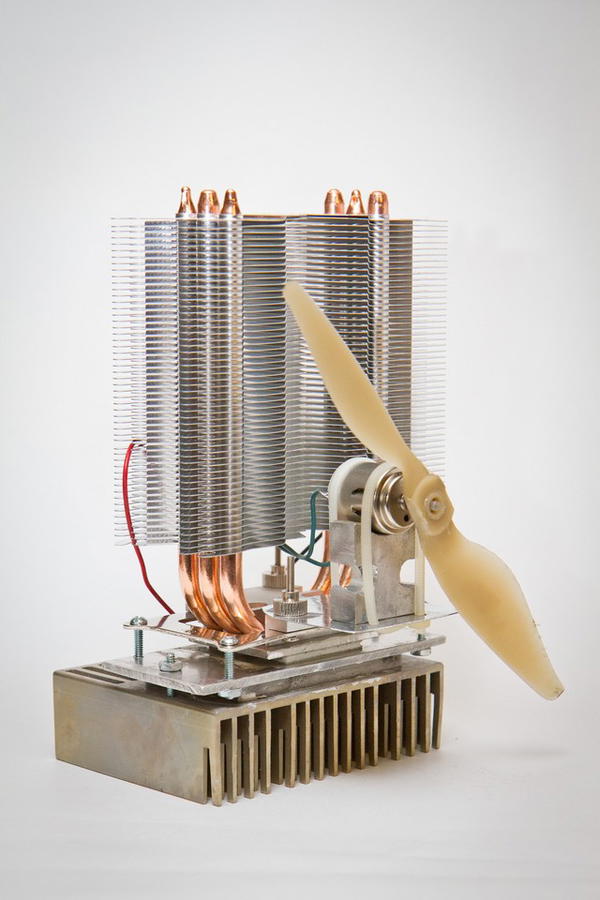
This DIY wood stove fan is an easy, inexpensive project that anyone can build. To build this fan, you must access a power source such as a power grid or generator. You also need to get the materials required to complete the project. The idea is fairly simple, but the construction details may not be so straightforward in some places. Creating something that produces good power with very few resources is always enjoyable, and what better way than a woodstove fan?
Materials and tools:
- Drill
- Hacksaw
- C-clamps
- File/Sandpaper
- Soldering Iron
- Propeller
- Aluminum plate
- Nuts and bolts


