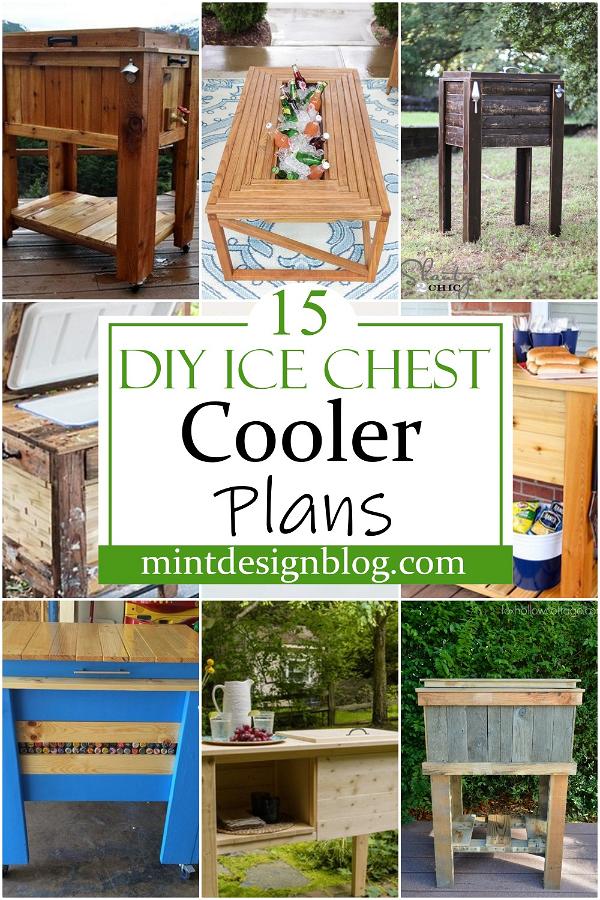
Summer is approaching, and that means hanging out sipping cool drinks on the back porch! But do you hate having to leave the conversation and head back indoors to grab another drink? A wooden ice chest cooler for your patio might be just the ticket. Cooler carts can be expensive, especially if they’re attractive and weatherproof. However, if you have some basic woodworking skills & tools you could save yourself a bundle by making your own.
DIY Ice Chest Cooler
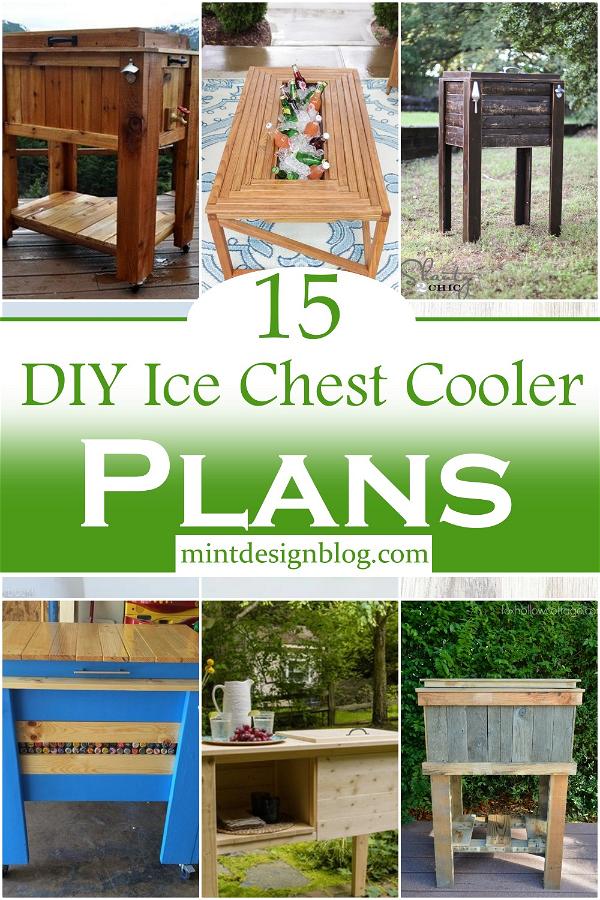
Wooden ice chest coolers are a great addition to your outdoor entertaining area, and they’re also a fun project for woodworkers who want to try their hand at a little carpentry. Some of the plans here will require you to use tools you may not have used before, but if you take anything away from this article it should be that making your own wooden ice chest cooler is well within your reach! Let’s get started with a plan for easy 15 Wooden DIY Ice Chest Cooler Plans. This project is simple enough for beginners with only one step, cutting the wood. You’ll need to be able to drill holes and screw pieces together in order to finish the job, but other than that no special skill is required.
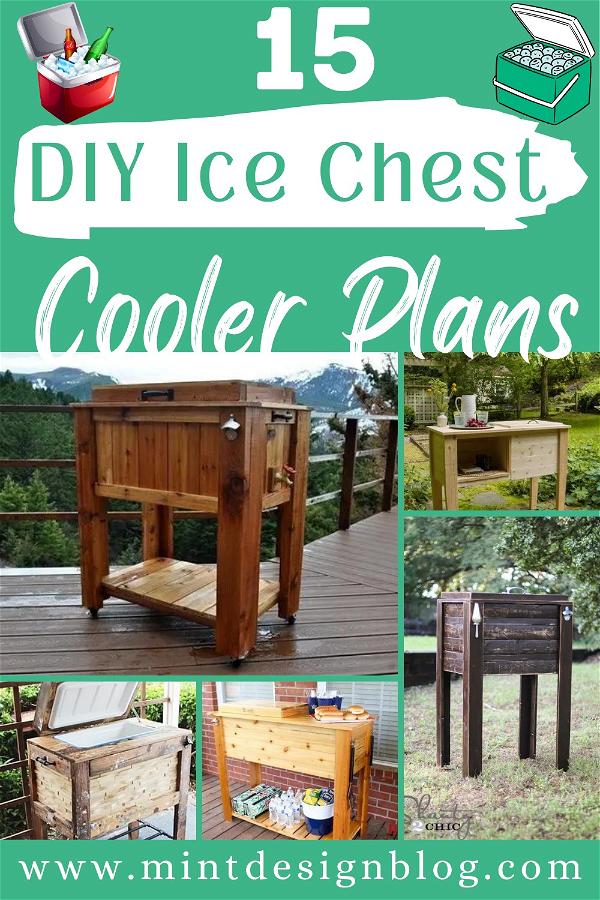
Have you ever wanted to build your own DIY ice chest or cooler, but didn't want to pay for expensive plans or worry about them being unclear? I've got you covered. Here are 15 detailed DIY ice chest and cooler plans that give you everything you'll need to build your own.
How To Build A Rustic Cooler Box
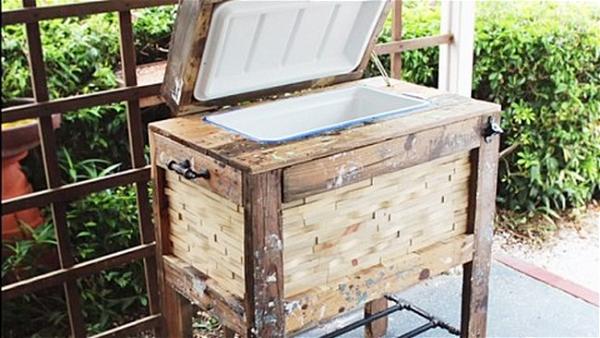
Everyone knows that drinking on the water is the best, especially when you are floating down your favorite river. Open your door to a summer of cool water fun with this rustic cooler box. Made by hand from reclaimed materials, it will keep your food and drinks cool while you are out on the water. This cooler box made of reclaimed materials will keep your drinks and food cold for a few hours, even if you leave it out in the sun all day. Enjoy! Build an easy, rustic cooler box in one afternoon. This project only takes a few hours to build but will last for decades. Using reclaimed materials, you can build this to match any decor that you want for outdoor entertaining.
MATERIALS:
- Pallets
- Plastic Igloo Cooler
- Hardware Wheels or Casters
- Screws
- Glue
- Stain
- Paint
- Valve for Drainage System
- Hardware Hinges
TOOLS:
- Sawzall Blades
- Pry Bar and Hand Hammer
- Measuring Tape
- Pencil
- Kreg Jigs or Hardware Wood Holding System
- Circular or Hand Saw
- Sandpaper
- Screw Driver or Screw-Gun
- Leveling Apparatus
Cedar DIY Wooden Ice Chest Cooler Plan
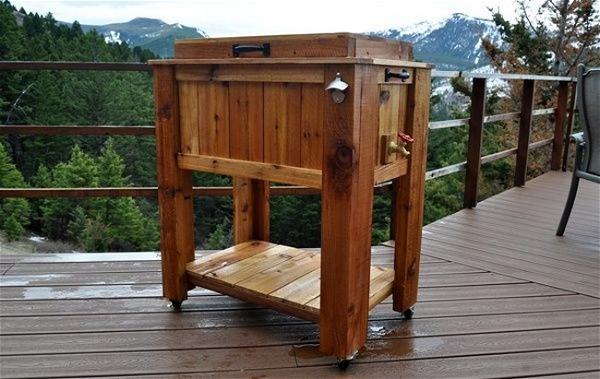
Cedar ice chest plans and how to build a wooden ice chest with information on how to make an ice chest cooler. You will get instructions on how to build a DIY cedar ice chest that you can use as a beer cooler, or just as a nice piece of furniture for the deck. This cedar cooler plan has it all: bottle opener, drain spigot, decorative carvings, and storage space underneath. With a complete cutting list and diagrams, this DIY ice chest plan will give you everything you need to know about building an ice chest and a great tutorial on woodworking to boot!
The plan for this beautiful cedar box cooler is a true pleasure to get. This multi-purpose cooler has wheels, a spigot and little storage compartment underneath, and a bottle opener on the side! A stylish piece of furniture and a great way to keep your cold drinks at just the right temperature.
MATERIALS:
- Wood Glue
- Box of Kreg Screws
- Driil Bits
- Grit Sandpaper
- nails for air nailer
- Teflon Tape
- Riser,
- threaded Piping, coupler, Red knob spigot/valve
- locking caster wheels
- Quart Igloo Contour Cooler
- 2 Hinges
- 3 Handles
- Bottle Opener
- Optional: Bottle Cap Catcher
- Paint Brush
- Minwax Helmsman Spar Urethane
- Rubber gloves
- Safety glasses
- Ear Protection
TOOLS:
- Miter Saw
- Dewalt Orbital Sander
- Kreg Jig
- Table Saw
Air Nailer - Drill
Tape Measure, - Ruler,
- Pencil
Wrench - Clamps Dewalt Circular
- Kreg Jig Face Clamp
- Kreg Jig Right Angle Clamp
- Speed Square
- Hand Sander
- Hole Saw Set
Grill Cart DIY Wooden Ice Chest Cooler Plan
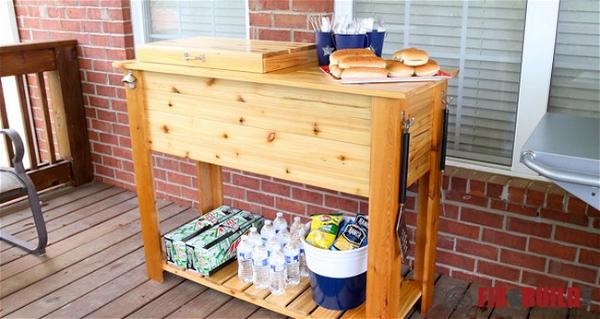
Are you looking for a unique, double-duty cooler? He built this one from cedar scraps and pallet wood, adding the casters and stainless steel handles to make it portable. his grill cart combines two of the most useful accessories for your deck, grill, or patio. A built-in cauterized cooler with a built-in ice chest allows you to always have cold drinks and snacks close at hand while entertaining…and it also gives you a handy cart to transport coolers and other items when needed. Designed to keep your drinks and food cold, this cedar cooler is also a movable kitchen island on wheels, perfect for entertaining and impressing your friends. It includes the plans and cut lists for the base, canopy top, and optional cutting board top.
MATERIALS:
- (13) 12′ 1×4 cedar boards
- 1-¼″ Pocket Hole Screws
- 1-¼″ Exterior Screws
- 48qt Cooler
- 3″ utility hinges
- Front handle
- Bottle Opener
- Single Hooks
- Hose Bib
- PVC fittings
TOOLS:
- Dual-Bevel Miter Saw
- Toolkit
- Compact Router
- Brad Nailer
- Oscillating Spindle Sander
- Pocket hole jig
- Tablesaw (or circular saw)
- Click here for the complete list of tools and materials
Country DIY Wooden Ice Chest Cooler Plan
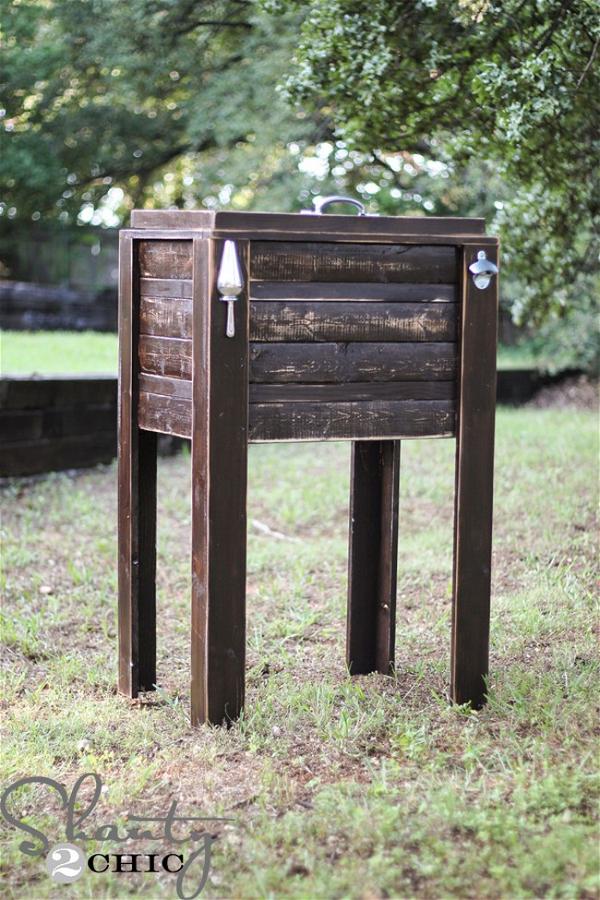
Looking for an ice chest that is sturdy and cool? This ice chest is perfect for your cool drinks and even cold snacks. Built-in a weathered country style, it has a rustic charm that you're sure to fall in love with. This ice chest is definitely the talk of your next backyard get-together. This country cooler is a great project to add function and character to your yard. It’s adorable, durable, and with a little elbow grease, you can have it done in an afternoon. In this plan, You’ll learn how to design it, pick out the lumber, choose the hardware, and then follow through on your build from start to finish.
MATERIALS:
- silicone sealant
- sink flange
- U Bolt
- Ice scoop
- Zinc bottle opener
- Hooks
TOOLS:
- 2×3 board
- Zinc narrow hinges
- Rubber stopper with chain
- Zinc utility pull
Click here for the complete list of tools and materials
Picnic Table DIY Wooden Ice Chest Cooler
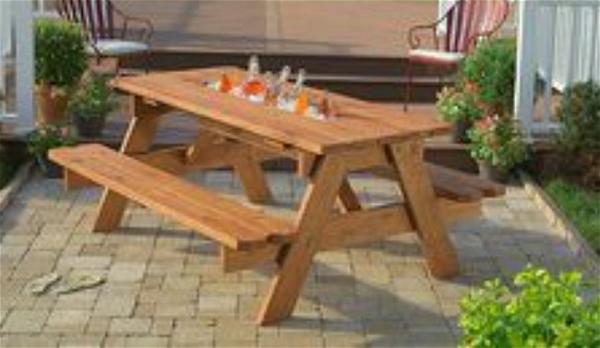
If you’re one of those people that just can’t wait to get their next cold beverage, we have the perfect solution for you. This table is designed to hold all your drinks, while still leaving room for a nice meal to be shared by your family and friends. This picnic table cooler plans are a simple idea in a sturdy and pleasing package. And as a bonus, you can get everything you need for the project all in one spot! Get your own picnic table cooler, just like all the kids who went camping with their families this summer. It’s an easy repurposed-wood project that will save you both money and time. With This picnic table cooler plan, you will be able to get everything you need for the project all in one spot!
- MATERIALS:
- Wood Glue
- Box of Kreg Screws
- Drill Bits
- Grit Sandpaper
- nails for air nailer
- Teflon Tape
- Riser,
- threaded Piping, coupler, Red knob spigot/valve
- locking caster wheels
- Quart Igloo Contour Cooler
- 2 Hinges
- 3 Handles
- Bottle Opener
- Optional: Bottle Cap Catcher
- Paint Brush
- Minwax Helmsman Spar Urethane
- Rubber gloves
- Safety glasses
- Ear Protection
TOOLS:
- Miter Saw
- Dewalt Orbital Sander
- Kreg Jig
- Table Saw
Air Nailer - Drill
Tape Measure, - Ruler,
- Pencil
Wrench - Clamps Dewalt Circular
- Kreg Jig Face Clamp
- Kreg Jig Right Angle Clamp
- Speed Square
- Hand Sander
- Hole Saw Set
Pallet DIY Wooden Ice Chest Cooler Plan
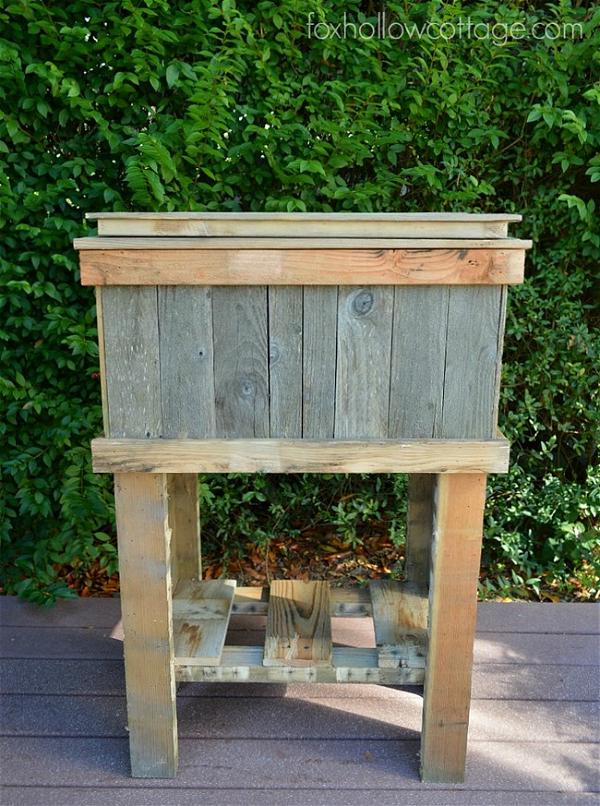
Ever wanted a custom cooler for your own house that looks great and is durable? This project is easy enough that anyone could make one with just a few basic tools. Best of all it will use materials that would have otherwise sat in a pile in your backyard. If you have an old cooler laying around at home it's actually possible to deconstruct the two pallets and have room to build an icebox around the cooler.
Pallets are a great DIY project because they are free and very easy to work with. If you want to spruce up your patio for parties or gatherings in the summer this ice chest is the perfect fit. Have an outdoor party, but not enough room for all of your beverages? This DIY Pallet Ice Chest is perfect for keeping beverages out of the sun and cold. This DIY guide shows you everything you need to know.
Patio DIY Wooden Ice Chest Cooler Plan
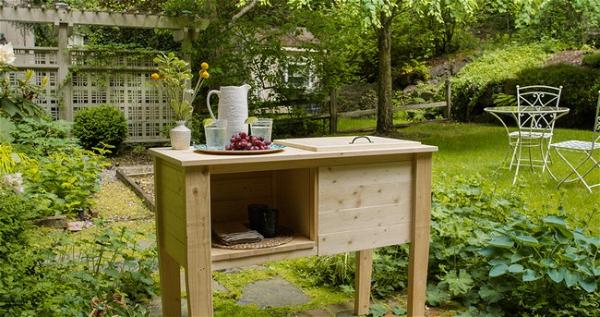
These plans will give you all the details to build your own simple but elegant wooden patio cooler stand. If you are new to building, this resource will show you how to get started and how to finish up a simple project. Even if you have some experience, this guide can be a great thing to have as a reference. These plans are not your typical patio DIY wooden ice chest cooler plan. Instead, they will instruct you on how to build an extra-large patio planter that also doubles as an ice chest. It’s a refreshing take on an old classic from decades past (don’t worry; no power tools are required). The stand is simple but elegant and the perfect complement to some cold beverages. Perhaps best of all, it makes storage easy on yourself and others.
| Materials Needed | Tools Needed |
| Cooler | Paintbrush |
| Stain and paint | Drill |
| 3M™ sanding blocks | Table saw |
| 2 lid hinges and lid hinge arm (to hold it open) | |
| Hose bib | |
| 8” of ½” flexible tube | |
| Epoxy | |
| Bottle Opener |
8. Funky Little DIY Wooden Ice Chest Cooler Plan
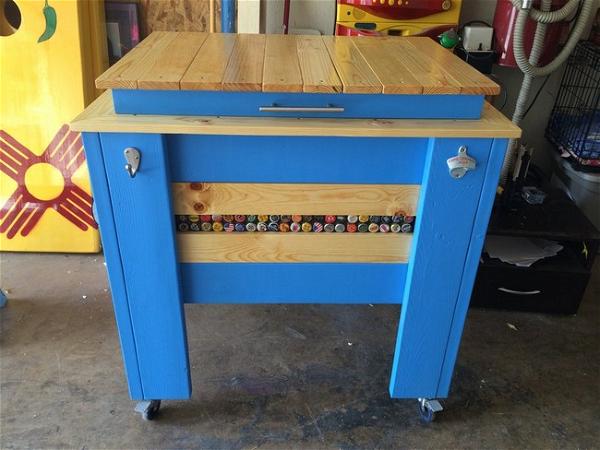
Want a unique, one-of-a-kind ice chest to take camping? These plans come with detailed pictures, step-by-step directions, and all the information you need to build your own ice chest from scratch. This plan will show you how to build an Ice Chest using the Kreg Jig, a simple set-up for sawing, drilling, sanding, and more. These wooden cooler plans will show you exactly how to build your own uniquely decorated ice chest. Perfect for the beach, or great just to keep in the backyard ready for a day of fun. Great look, well-organized plans, and a sweet finished project. It is easy to build, disassemble, and store away, taking up only minimal space. This DIY wooden ice chest cooler plan can be easily modified to fit your needs and lifestyle.
- MATERIALS:
- Wood Glue
- Box of Kreg Screws
- Drill Bits
- Grit Sandpaper
- nails for air nailer
- Teflon Tape
- Riser,
- threaded Piping, coupler, Red knob spigot/valve
- locking caster wheels
- Quart Igloo Contour Cooler
- 2 Hinges
- 3 Handles
- Bottle Opener
- Optional: Bottle Cap Catcher
- Paint Brush
- Minwax Helmsman Spar Urethane
- Rubber gloves
- Safety glasses
- Ear Protection
TOOLS:
- Miter Saw
- Dewalt Orbital Sander
- Kreg Jig
- Table Saw
Air Nailer - Drill
Tape Measure, - Ruler,
- Pencil
Wrench - Clamps Dewalt Circular
- Kreg Jig Face Clamp
- Kreg Jig Right Angle Clamp
- Speed Square
- Hand Sander
- Hole Saw Set
Coffee Table DIY Wooden Ice Chest Cooler Plan
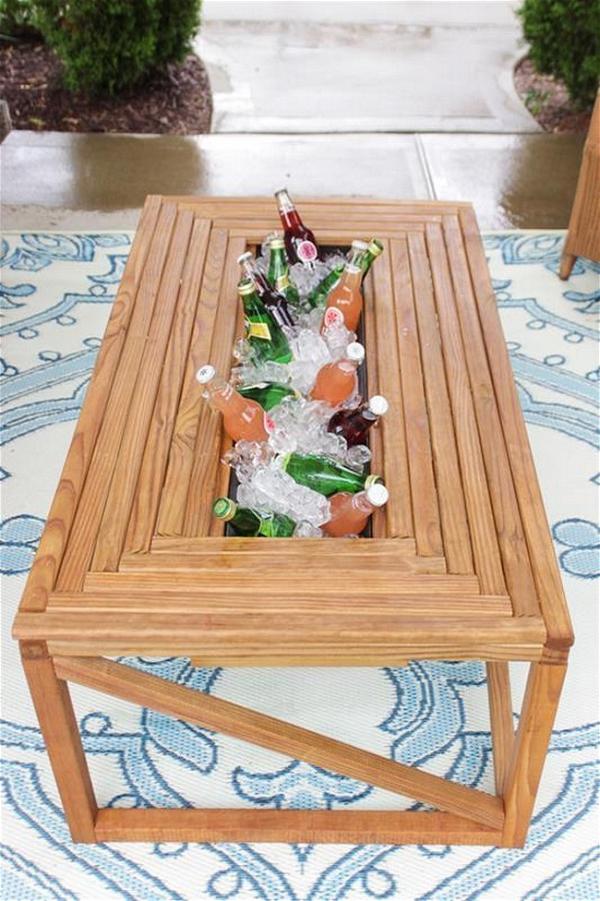
Can’t decide what kind of table to build for your outdoor space? This diy wooden coffee table is the space-saving, versatile solution you need. It makes an excellent coffee table or a handy cooler for parties and barbecues. This is the perfect DIY project for the do-it-yourselfer with a passion for woodworking. If you have access to a woodshop, you’ll be able to find all of the wood and hardware necessary to build this table at your local home improvement store. A wooden chest cooler is a perfect complement to any outdoor patio. This coffee table and cooler combo can be built with just a few inexpensive tools and materials. Sized to hold several cans, the cooler can be used as an ice bucket as well. Let’s jump right in to learn just how easy it is to build this table!
- MATERIALS:
- Cedar-Tone Treated Pine
- 12Cedar-Tone Treated Pine
- 3Cedar Picket - Ripped To 2" Strips
- 2Pressure-Treated Fill-It Strip
Hardware & Supplies
- Thompson's Timber Oil In Natural
- Grit Sandpaper
- Exterior Wood Screws
- Exterior Pocket Hole Screws
- Wood filler
- Exterior 18 Gauge Nails
- Exterior 18 Gauge Nails
- Cotton Cloth
- Exterior 18 Gauge Nails
- Exterior 18 Gauge Nails
Rugged Pallet DIY Wooden Ice Chest Cooler Plan
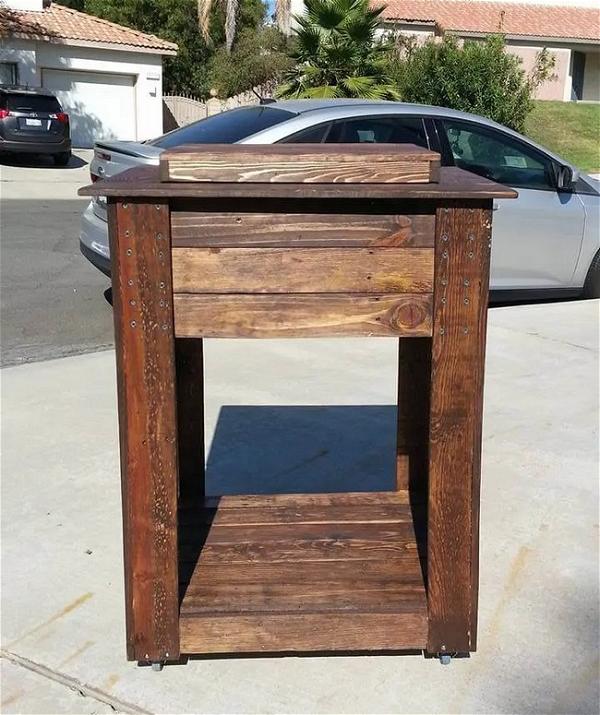
Looking for a great-looking cooler on a budget? This is an ice chest you can build with ordinary lumber typically found around the home. Do it Yourself (DIY) a cooler stand that showcases your creativity and talent with this simple plan. This cooler stand is made from discarded wooden pallets and an assortment of cool-looking hardware. It's a budget build that requires minimal tools, knowledge, or cost. Perfect for camping, tailgating, day drinking, beaches, and boating. This rugged pallet cooler will add a touch of rustic charm to your outdoor activities. This stand looks super cool and works even better as you fill 'er up with drinks. This is a plan that should be used with our free pallet cooler plans available by entering the giveaway at the bottom of this post.
MATERIALS:
- Pallets
- Plastic Igloo Cooler
- Hardware Wheels or Casters
- Screws
- Glue
- Stain
- Paint
- Valve for Drainage System
- Hardware Hinges
TOOLS:
- Sawzall Blades
- Pry Bar and Hand Hammer
- Measuring Tape
- Pencil
- Kreg Jigs or Hardware Wood Holding System
- Circular or Hand Saw
- Sandpaper
- Screw Driver or Screw-Gun
- Leveling Apparatus
Click here for a complete list of materials and tools
Industrial DIY Wooden Ice Chest Cooler Plan
Relax with friends and family at any outdoor event when you build this DIY wooden ice chest cooler. Designed to look like a wooden ice chest, this cooler can endure any environment. If you enjoy tailgating and outdoor parties, this is the cooler for you. Built using super durable decking material, this cooler will be able to withstand any weather. This simple plan will show you how to build a customized cooler chest out of wood, using Trex material. This is the perfect build for anyone looking to add a little more flair to their outdoor setting! Designed for the true DIY enthusiast, the plans show how to utilize the strength of Trex decking material for an extra sturdy and durable cooler for years to come.
MATERIALS:
- stainless screws
- Black pipe, t-joint
- Black pipe, flange
- Caster
- Black pipe, 2” section
- Furniture sockets
TOOLS:
- Tape measure
- Miter saw
- Bar clamps
- Drill/driver
- Combination countersink drill bit - ⅛ inch
- Straight edge
- Circular saw
Click here for a complete list of materials and tools
12. Vintage Chair DIY Wooden Ice Chest Cooler Plan
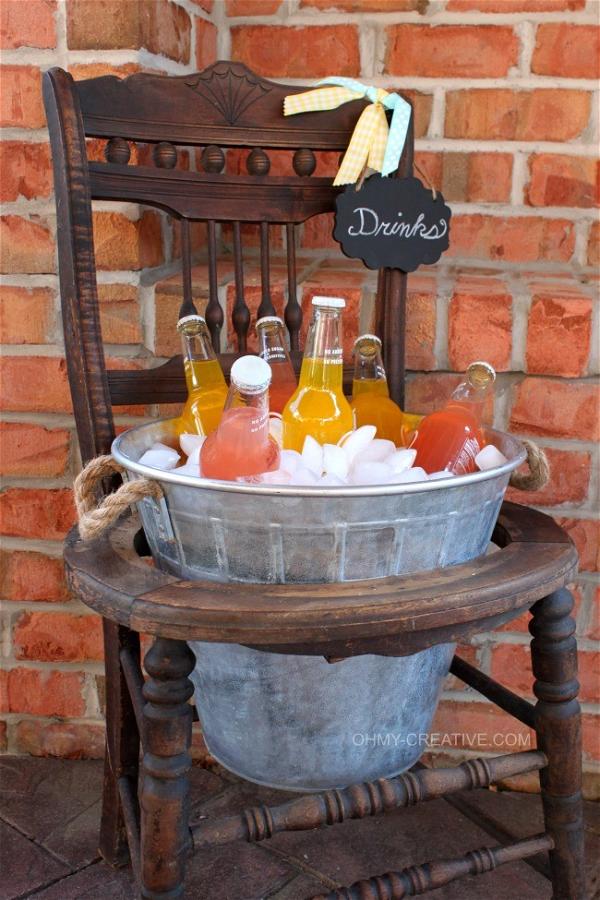
If you love the rustic decor, you’re going to go crazy for this project. It’s easy and affordable, too! This vintage chair DIY wooden ice chest cooler plan will take you from concept to cocktail party in no time flat. It’s the perfect way to upcycle an old chair. And the best part is – it’s a unique solution that will look great once it’s finished." This stylish wooden ice chest is surprisingly easy to build, cool to look at and it holds a lot of drinks. The best part is you can build this classic-looking cooler chair out of an old wooden chair you might have in the garage or attic. This project is low on tools but high on charm and possibilities for the DIYer who likes to live on the edge.
| Materials Needed | Tools Needed |
| Chair | Saw |
| Old English Lemon Oil | |
| Bucket |
How To Build A Cedar Ice Chest
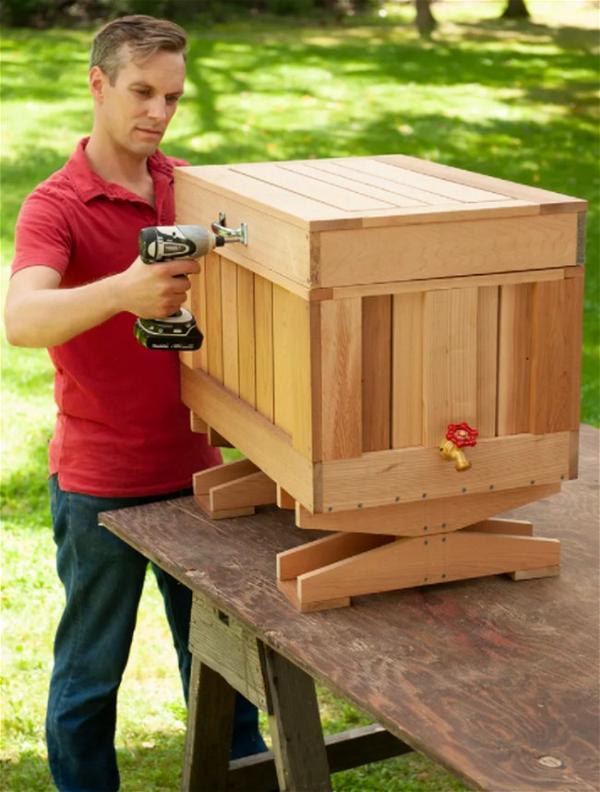
Cedar ice chests are a great project to make for storing your catch or food. They are easy to build and will last you as long as you take care of them. You can build one yourself but many stores carry them already built and priced around $150. If you have someone in your circle of friends or family who is handy and has the time, ask them to make one for you. It is a great way to save money and at the same time help someone with their handy work. Ice chests can also be used for other things such as camping gear, fishing equipment, hunting gear, food storage, food preparation, etc...
Cedar ice chests are often used in the outdoors to store food and drinks. A cedar ice chest is a good way to keep the food cool while out fishing or on a day trip. A cedar ice chest can be easily broken down and reassembled and is made of durable materials that will last as long as you take care of it.
MATERIALS:
- Pallets
- Screws
- Glue
- Stain
- Paint
- Valve for Drainage System
- Hardware Hinges
TOOLS:
- Tape measure
- Miter saw
- Bar clamps
- Drill/driver
- Combination countersink drill bit - ⅛ inch
- Straight edge
- Circular saw
- Router with a 3⁄4 inch straight bit
- Screwdriver
- Twist drill bit - ⅛ inch
- Forstner bit - 1 inch
- Adjustable wrench
Upgrade Your Old Cooler With This Clever
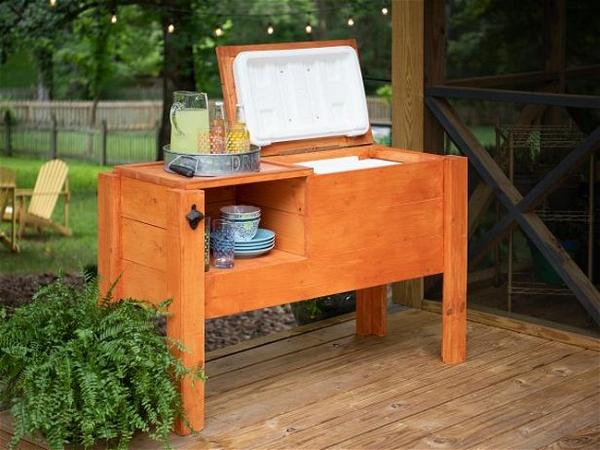
Do you carry your cooler everywhere you go? It's time to upgrade your old cooler with these clever inventions! It's an awesome ice-less ice pack that saves you money and the environment! Perfect for picnics, road trips, boating, RVing, and more!
Upgrade your old cooler with this clever Compact Iceless Cooler. It features a built-in ice pack and drains plug, while its removable hard plastic ice mold will keep your drinks cold for up to three days - longer than most traditional coolers. Great for keeping the drinks and snacks cool on those hot summer days, it also comes with a free carrying bag so you can take it wherever you're headed!
MATERIALS:
- Pallets
- Plastic Igloo Cooler
- Hardware Wheels or Casters
- Screws
- Glue
- Stain
- Paint
- Valve for Drainage System
- Hardware Hinges
TOOLS:
- Sawzall Blades
- Pry Bar and Hand Hammer
- Measuring Tape
- Pencil
- Kreg Jigs or Hardware Wood Holding System
- Circular or Hand Saw
- Sandpaper
- Screw Driver or Screw-Gun
- Leveling Apparatus
Wooden Cooler Stand
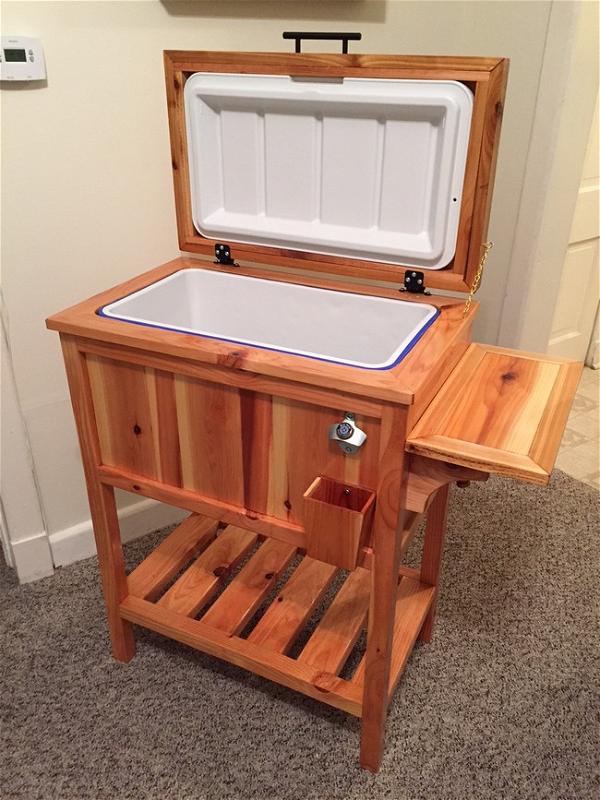
The Wooden Cooler Stand is made from solid wood to match your classic metal cooler. No need for additional racks or shelves, this foldable stand fits most varieties of metal coolers and keeps them securely upright while transporting. These are perfect for serving chips, fruit, and other snacks at a picnic or barbecue, the Wooden Cooler Stands are the perfect accompaniment. Made of sturdy and naturally gorgeous hardwood, the stands are made of pressed wood and include a drain hole for easy cleaning.
This sturdy wooden stand for your small kitchen or bar cooler not only keeps your drinks up off the ground but also allows them to drain. This stand is handcrafted and hand-stained. It's made from solid hardwood and is designed to match your cooler so that you can enjoy the beer the way it was meant to be enjoyed at the cottage or on the deck!
MATERIALS:
- Pallets
- Plastic Igloo Cooler
- Hardware Wheels or Casters
- Screws
- Glue
- Stain
- Paint
- Valve for Drainage System
- Hardware Hinges
TOOLS:
- Sawzall Blades
- Pry Bar and Hand Hammer
- Measuring Tape
- Pencil
- Kreg Jigs or Hardware Wood Holding System
- Circular or Hand Saw
- Sandpaper
- Screw Driver or Screw-Gun
- Leveling Apparatus
CONCLUSION:
These plans will show you everything you need to build your own stunning Ice Chest Cooler that you can use anywhere, anytime. You'll start by learning how to properly measure and lay out the wood for precise cuts without having to pay for someone else's mistakes. Once you build it, you will have the confidence in your own skills to know that your ice chest can be used for a lifetime of parties and events. No more wasted money on cheap coolers that wear out quickly.
See Other Projects
